

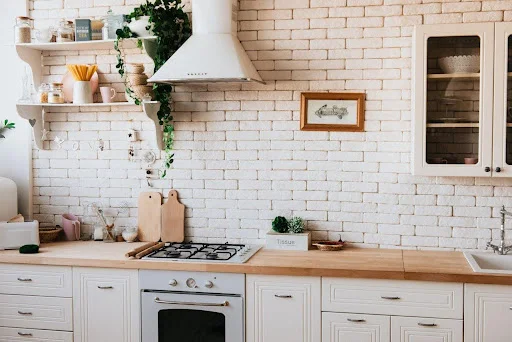
A vintage wood kitchen island is more than just a piece of furniture. It is often the heart of the kitchen. It brings warmth, history, and natural beauty into your home. Whether your island is a true antique kitchen island or a newer piece with a distressed wood finish, proper care is very important. Wood is strong and long lasting, but it also needs attention and protection to stay beautiful for many years.
In this guide, you will learn how to clean, protect, and preserve your vintage wood kitchen island in a simple and practical way. These tips will help you avoid damage, prevent stains, and keep the natural charm of your solid wood kitchen island.
Understanding Your Vintage Wood Kitchen Island
Before you start maintenance, it is important to understand the type of wood and finish your island has. Some islands are made from oak, maple, or pine. Others are made from reclaimed wood, which often has natural marks and texture from previous use. A reclaimed wood kitchen island may already have small cracks or nail holes, and that is part of its character.
Some vintage islands have a butcher block island top used for food preparation. Others may have a painted finish, especially in farmhouse kitchen island or French country kitchen island designs. Knowing your surface helps you choose the right cleaning and protection method.
Wood is a natural material. It expands and contracts with changes in humidity and temperature. That is why regular care is necessary to prevent warping, cracking, or fading.
Daily Cleaning and Basic Care
Daily cleaning is the first step in protecting your vintage wood kitchen island. Always wipe the surface after cooking or food preparation. Use a soft cloth slightly dampened with warm water. Avoid soaking the wood because too much water can damage it.
If you have a butcher block island surface, clean spills immediately. Liquids like wine, coffee, or oil can stain the wood if left too long. For sticky spots, use mild dish soap mixed with water. Gently wipe the area and dry it right away with a clean towel.
Never use harsh chemical cleaners or bleach. These products can remove the finish and damage the natural grain of your solid wood kitchen island. Gentle cleaning keeps the wood strong and prevents surface damage.
Protecting the Surface from Heat and Scratches

Heat is one of the biggest risks to a vintage wood kitchen island. Placing hot pans directly on the surface can leave burn marks. Always use trivets or heat pads under hot cookware. This simple habit can prevent permanent damage.
Scratches are another common issue. Even a rustic kitchen island with a distressed look can suffer deep scratches that weaken the finish. Use cutting boards instead of cutting directly on the wood. Place mats under heavy kitchen appliances to avoid pressure marks.
If your island is also used as a kitchen island centerpiece for serving meals, encourage family members to use placemats and coasters. Small protective habits make a big difference over time.
Oiling and Conditioning the Wood
If your vintage wood kitchen island has a natural or butcher block finish, regular oiling is essential. Food safe mineral oil is commonly used for butcher block island tops. Apply oil every few weeks, depending on how often the surface is used.
To oil the surface, clean and dry it completely. Then apply a thin layer of mineral oil using a soft cloth. Let it soak in for several hours or overnight. Wipe away any extra oil. This process keeps the wood hydrated and prevents cracks.
For a reclaimed wood kitchen island, conditioning also helps maintain its rich texture. If the island has a sealed finish, you may not need frequent oiling. Instead, use a wood safe polish to maintain shine and protection.
Managing Humidity and Temperature
Wood reacts to the environment. High humidity can cause swelling, while very dry air can cause shrinking and cracks. Keeping your kitchen at a stable temperature helps protect your vintage wood kitchen island.
Avoid placing the island near direct heat sources like ovens, dishwashers, or heating vents. If possible, use a humidifier during dry winter months. This helps prevent the wood from drying out too much.
In areas with high humidity, make sure your kitchen has proper ventilation. Good airflow reduces moisture buildup and protects your solid wood kitchen island from warping.
Removing Stains and Minor Damage
Even with good care, small stains may appear over time. For light stains on a butcher block island, gently sand the affected area with fine sandpaper. Always sand in the direction of the wood grain. After sanding, clean the dust and apply mineral oil to restore protection.
For deeper scratches on a distressed wood kitchen island, you can use wood filler that matches the color of the wood. After it dries, lightly sand and refinish the area if needed.
If your island is a true antique kitchen island, be careful with repairs. Over sanding can remove its original character and reduce value. In such cases, professional restoration may be the best option.
Read More: Office Interior in Gurgaon: Creating Workspaces That Inspire Growth
Protecting Painted and Finished Surfaces
Some farmhouse kitchen island styles come with painted bases and natural wood tops. Painted areas should be cleaned gently with mild soap and water. Avoid scrubbing too hard, as it can remove paint.
If the finish starts to chip, touch up the area with matching paint to prevent moisture from entering the wood. For sealed surfaces, reapplying a protective topcoat every few years helps maintain durability.
A well maintained finish protects your vintage wood kitchen island from stains and everyday wear.
Long Term Preservation Tips
Long term protection requires regular attention. Inspect your island every few months. Look for loose joints, cracks, or changes in the wood surface. Tighten screws or hardware if needed.
If your kitchen island with storage includes drawers and cabinets, make sure they open and close smoothly. Lubricate hinges if necessary. Keeping hardware in good condition supports the overall structure.
Avoid dragging the island across the floor. If it is a rolling kitchen island, check that the wheels are clean and functioning properly. Lock the wheels when not moving it to prevent accidents.
Over time, refinishing may be needed. Sanding and resealing the top surface can restore beauty and extend the life of your vintage wood kitchen island. This is especially helpful for islands used daily for cooking and meal preparation.
Preserving the Beauty of Your Vintage Wood Kitchen Island
A vintage wood kitchen island is not just furniture. It is part of your home’s story. With regular cleaning, proper protection from heat and moisture, and occasional conditioning, your island can last for decades.
Caring for wood does not have to be complicated. Simple daily habits, gentle cleaning products, and attention to humidity make a big difference. Whether you own a rustic kitchen island, a reclaimed wood kitchen island, or a classic farmhouse kitchen island, proper maintenance protects its natural charm and strength.
By treating your island with care, you preserve both its function and its timeless beauty. A well maintained vintage wood kitchen island will continue to be the heart of your kitchen for many years to come.