

The most frustrating issues that photographers have to deal with are blurry images, jiggly shots, and soft images, and they are mostly encountered during low-light periods, long exposures, or heavy lenses. Novices purchase a tripod and fail to use the device properly, thus achieving low stability and skewed framing, as well as unsatisfactory results.
This is a step-by-step tutorial on how to use a tripod for photography, especially for beginners and hobbyists, and other types of people who do not need fancy tricks to capture sharper shots. Getting the tripods in place, attaching the camera to the tripod, and not making the same mistake that causes a poor snapshot, this guide will show you how to properly position your tripod, secure the camera, and prevent making the same mistakes that can spoil the quality of the shot.
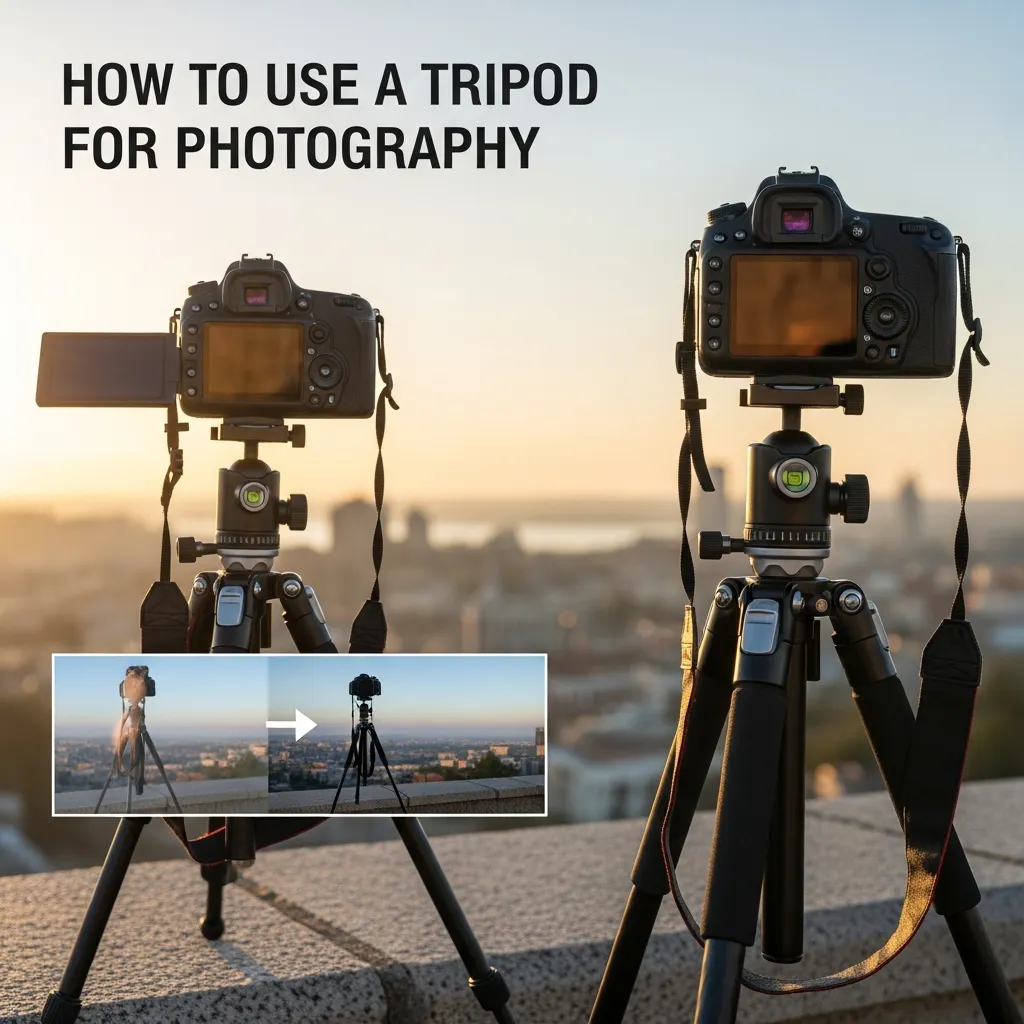
What Is a Tripod and Why Photographers Use It
The tripod is a three-legged camera support that holds your camera steady when taking a picture. By putting your camera on a tripod stand, you eliminate the motion of your hand, and you control the camera completely. This stability makes it easy to have more accurate and steady images.
A tripod is used by photographers to avoid shaking the camera, thus resulting in the blurring of photos. The effect of the camera shaking is more evident in darker areas and during low shutter speeds. The camera is mounted on a tripod, which keeps the camera stable, and therefore the sensor can take clean and sharp shots with no motion blur.
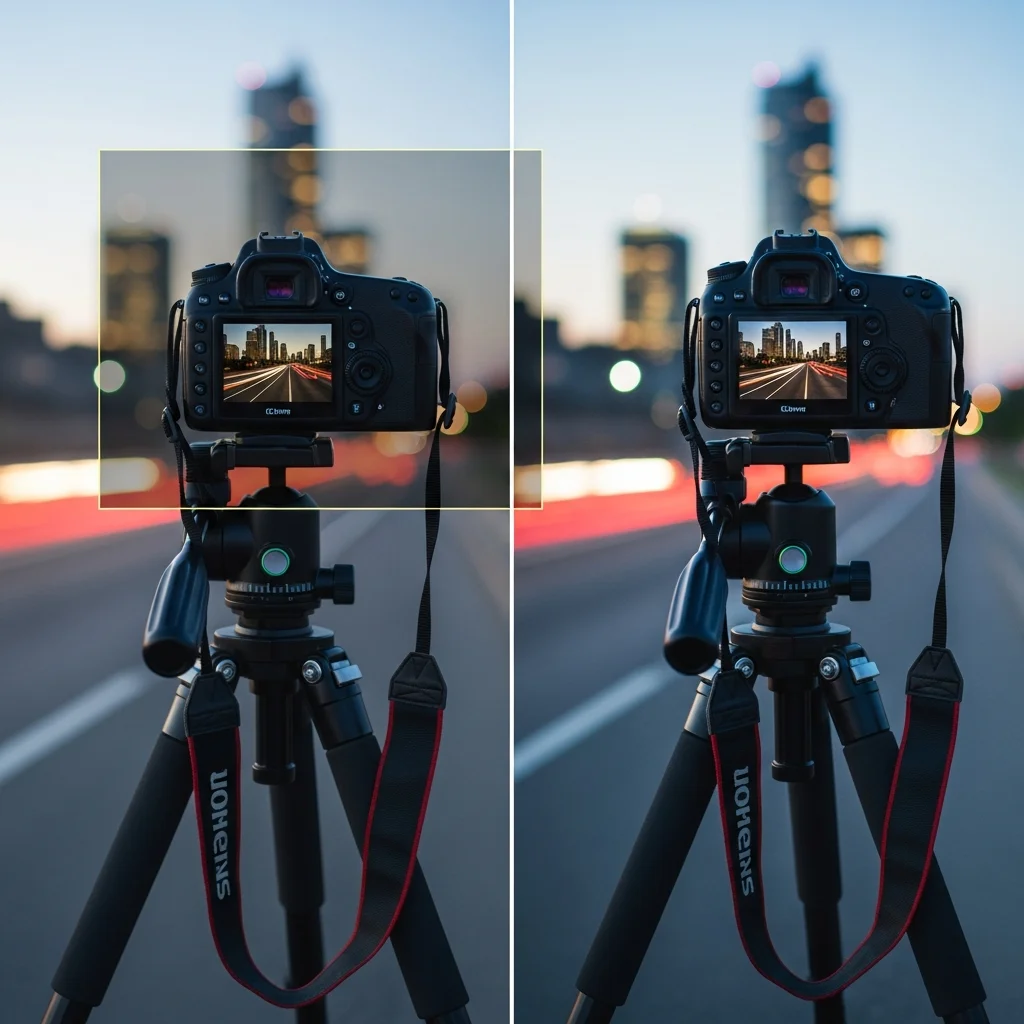
The tripod is also important in long exposure photography, waterfalls, light trails, and night shots. It allows you to be able to do longer shutter speeds but hold the frame still. Moreover, a tripod assists in accurate composition because it is easier to stabilize the camera, find the horizon, and frame the photo perfectly.
Types of Tripods for Photography
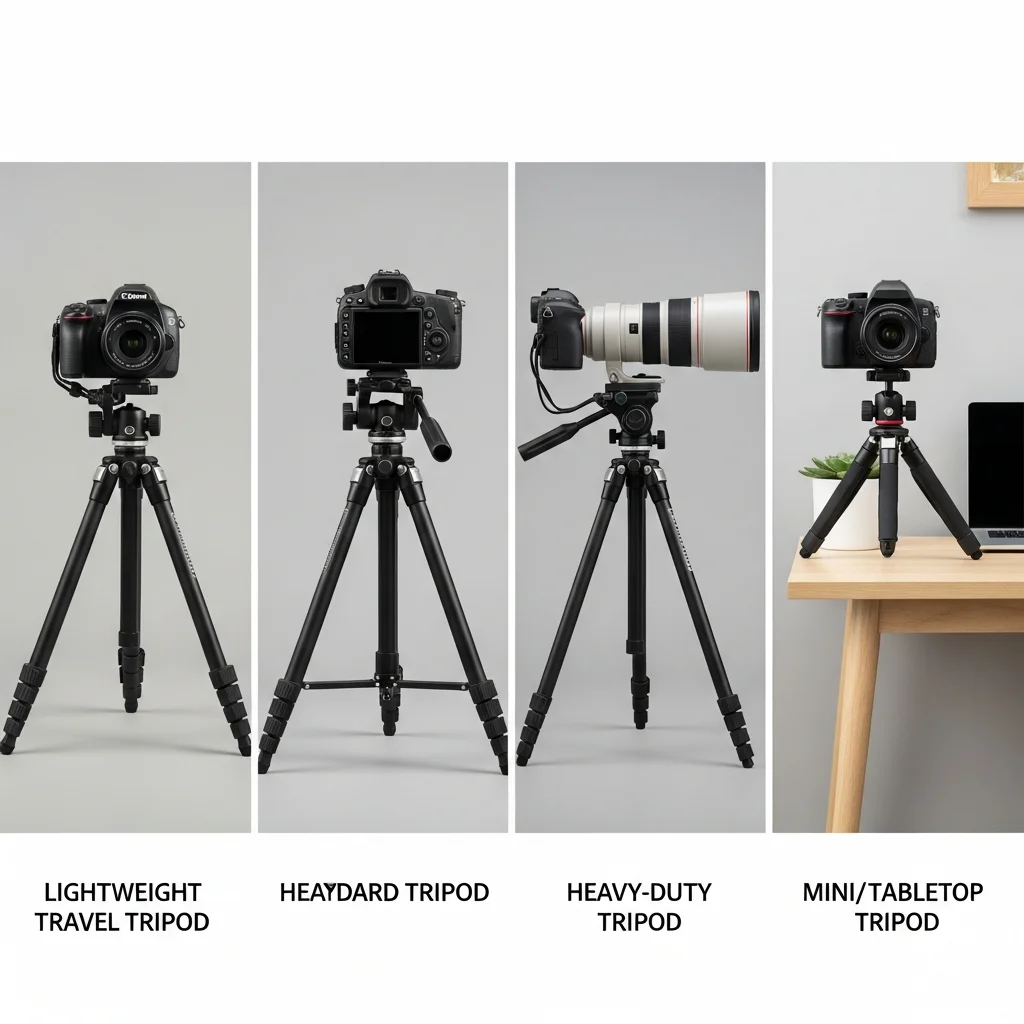
The various types of photography have different types of tripods. The correct tripod enhances stability, handling, and general shooting experience.
A travel tripod is concerned with portability. The manufacturers employ lightweight materials such as aluminum or carbon fiber to ensure that the weight is low. These tripods are small enough to fit in a backpack, fold-down and are ideal for traveling and street photography, as well as casual outdoor photography where you change location quite often.
A standardtripod has a compromise between stability and scaling. It works with most DSLR and mirrorless cameras with kit or mid-range lenses. This type is used by photographers in their daily photography, such as portraits, landscapes, and general outdoor photography.
The large cameras and long telephoto lenses are used on a heavy-duty tripod. It has heavier legs, heavier locks, and increased weight capacity. In terms of wildlife, sports, and long-exposure photographers, heavy-duty tripods are used in case of vibrations created by heavy gear.
When a setup is small, a mini or table tripod will be suitable. It is placed on desks, tables, or flat surfaces to vlog, take pictures of a product, or shoot with your smartphone. The tripods are basic stability aids when the full-size tripod is not applicable.
Also Check: Gaming Adventures PlayBattleSquare Archives – Ultimate Gamer Guide
When Should You Use a Tripod for Photography
When handholding the camera is not possible to hold the shot steady, you should employ the use of a tripod. There are also instances of shooting where a tripod is crucial for getting in focus and controlled shots.
In low-light photography, a longer shutter speed is used by the camera to get sufficient light. Slow speeds of handholding are likely to cause motion blur. A tripod makes the camera steady and enables you to take clean shots with absolutely no noise, and you do not need to go too high with ISO.
A tripod will be required in case of long exposure shots, like waterfalls or light trails, or at night. These shots demand a prolonged shutter to a couple of seconds. The camera is positioned on a tripod, which makes the water look smooth and the trails of light sharp.
A tripod will assist you in framing the picture in landscape and architectural photography. It enables you to straighten the horizon, make buildings match, and precisely position composition. This accuracy enhances the general quality and uniformity of the images.
When dealing with macro photography, they can focus on the slightest movement. A tripod holds the camera in one position and allows you to concentrate the camera accurately on small objects such as flowers, insects, or textures.
Handholding is not comfortable when heavy lenses are employed, especially telephoto lenses. The tripod is used to balance the weight of the equipment and minimize the vibration effect so that you can produce clear and stable images.
How to Set Up a Tripod Correctly (Step-by-Step)
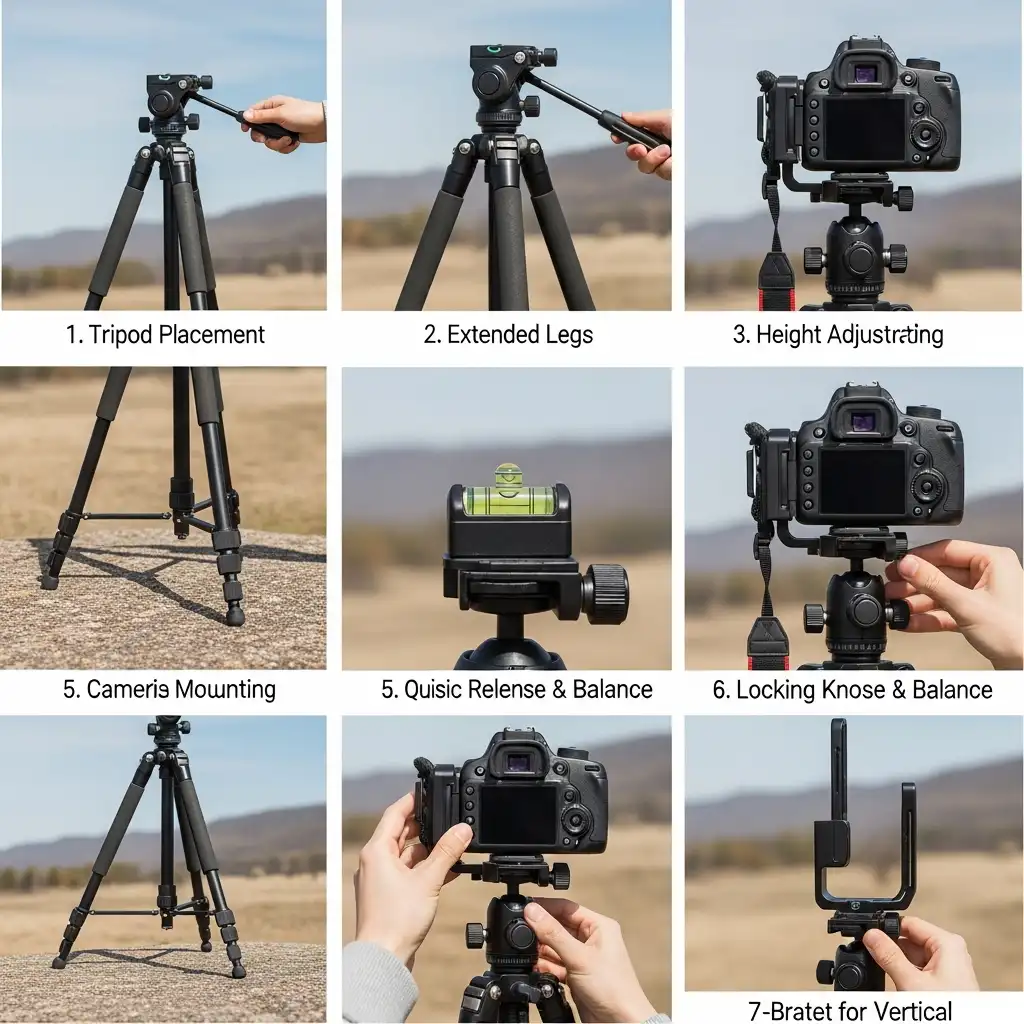
Begin with a flat and secure ground. Put the tripod on a firm surface such as rock, soil, or pavement. Do not use soft sand, loose gravel, or an uneven surface, as this creates movements and vibration during the shot.
Then the tripod legs should be opened to the fullest. Stretch the upper parts of the legs that are thicker, as they are more stable. Set one of the legs facing the subject, particularly a tilt or pan head. This arrangement provides a superior balance in moving the camera angle.
At this point, the tripod height should be adjusted with the help of the legs, not the center column. Bend every leg so as to align it at the height you want the camera. Always keep the center column low as much as possible, since by lifting the center column, stability will be compromised, and there is a tendency that the camera will shake.
Lastly, make the tripod level with the help of a bubble level. Test the built-in level of the tripod or tripod head and adjust the leg length until the bubble is in the middle. A level tripod is used to hold horizons, and it is easier to make composition changes.
How to Attach a Camera to a Tripod
Mounting the camera in the right position is very important for stability and safety. The loose or unbalanced installation may lead to vibrations or even damage to your equipment; that is why you should always ensure that you place the camera in a good position.
How to Put a Camera on a Tripod
Begin by connecting the quick-release plate to the camera. Place the plate with the tripod socket of the camera and screw it in place with your fingers or a coin. Ensure the plate is laid flat against the camera body in order to prevent twisting.
Secondly, position the plate with the tripod head. Slide or insert the plate in the mounting slot of the tripod head based on the locking system. Mount the camera on one hand and keep it when facing a drop of the camera.
Lastly, screw the plate on. Insert the locking lever or knob until the plate ceases to move. Shake the camera lightly to ensure that it is well fitted and does not move.
How to Mount a Camera on a Tripod Safely
Balancing the camera. After mounting, ensure that you check the balance of the camera. Position the camera such that the weight is on the tripod head resting in one position. This causes a decrease in the load on the mount and better stability.
Ensure that all knobs and locks are tightly closed, such as leg locks, head controls, and quick-release locks. The loose knobs may make it slow or time-consuming to tilt.
In cases of the vertical shots, one can use the L-bracket rather than tilting the head laterally. The L-bracket position keeps the camera at the center of the tripod and provides a better balance, particularly when the lenses make the camera heavier.
Choosing the Right Tripod Base Plate
The tripod base plate will join your camera with the tripod head, and therefore, the stability and safety directly depend on the right choice of the base plate. This may lead to movement or imbalance in the shooting because of a poor-quality or incompatible plate.
In the comparison of universal plates and the Arca-Swiss plates, the chief difference is compatibility and stability. Universal plates use numerous Tripod heads but frequently do not fit the locking points, so they can move slightly when under load. The Arca-Swiss plates have a standardized dovetail that fits in better and is the one most preferred by photographers who have heavier cameras or lenses.
It is recommended that the camera and lens weight support should always be noted, after which a base plate should be chosen. The combination of the weight of the camera and the lens must not flex the plate. Having a plate under-rated augments the probability of vibration and accidental loosening.
Lastly, ensure that it is compatible with your tripod head. Certain heads are supportive of certain plate systems. A matching plate will make the plate fit well, mounting faster and giving the plate a good balance.
Tripod Heads Explained
The movement of your camera and locking into a position is done by the tripod head. The selection of the appropriate head enhances handling, balance, and precision of shooting in the various styles of photography.
A ball head is equipped with one locking system to move the camera in every direction. Photographers like ball heads due to the fact that it is quick to change and to lock. Their use is in general photography, travel, and landscapes, where you have to reframe fast.
A pan-tilt head divides the movement into horizontal and vertical. This type of design enables accurate framing and easy movement, hence suitable for video recording and architectural or landscape photography. Pan-tilt heads are used when the photographer is concerned with the accuracy rather than the speed.
Long and heavy telephoto lenses are supported on a gimbal head that balances them on their center of gravity. Gimbal heads enable wildlife and sports photographers to track the movements of moving objects smoothly.
Are Tripod Gimbal Heads Good for Telephoto Lenses?
Gimbal heads are ideal with telephoto lenses, yes. They evenly spread the weight of big lenses, thereby putting less stress on your tripod to avoid unwanted shaking or tipping.
Gimbal heads are widely used by photographers when working in wildlife and sports photography, and you have to follow the moving object in a smooth movement. The tripod head is designed to be balanced to enable you to tilt, pan, and track action without having to keep readjusting the tripod head, and this will result in the long sessions being less exhausting and more accurate.
The gimbal head is such that the largest of the telephoto lenses seems lightweight and you can control them better and capture better shots in high-action shooting.
Should IBIS Be On or Off When Using a Tripod?
In the still image, do not use IBIS (In-Body Image Stabilization) when using a tripod. The majority of IBIS systems attempt to compensate for the minute movement; however, when on a stable tripod, this may introduce a little motion blur, particularly when shot with a long exposure.
In the case ofhandheld video, leave IBIS on. It removes shaking of hands and maintains the footage still, even when you are moving the camera.
In some cameras nowadays, IBIS is automatically turned on and turned off in response to the presence of a tripod. At that time, it is always a good idea to check your camera settings, but in order to make sure that stabilization does not interfere with your shot.
With the knowledge of when to turn IBIS on or off, you are able to maximize sharpness and reduce unnecessary blur with a tripod.
Common Tripod Mistakes Beginners Make
The improper use of a tripod may spoil an otherwise great shot. The following are some of the most frequent errors that beginners commit – and how to prevent them:
Extending the center column too much: The stability is decreased by raising the center column. It is always important to push the legs first, and the center column should be as low as possible. This avoids wobbling and vibration,s particularly when using heavy cameras or long lenses.
Not tightening tripod locks: Loose leg locks or head knobs are also possible to make it move or tilt with sudden motion. Always lock and screw every lock after you have attached your camera so as to secure it.
The camera strap should be left: The straps of the camera have the capability to swing and strike the tripod or lens when shooting. Take away or lock straps to avoid any unwanted motion and vibration.
Leaving the camera strap attached: Tripod positioning may result in awkward positions or unsteady arrangements when you position your tripod without planning your shot. First frame your shot, then put the tripod in place and adjust it at its most stable and composed position.
Setting up before choosing composition: These errors can be avoided, giving you the chance to have steadier, crisp,p and professional-appearing photographs whenever you use a tripod.
Tips to Get Sharper Photos With a Tripod
- Use a remote shutter or self-timer: The camera button can be pressed, resulting in slight shake. One should use a remote shutter, cable release, or self- timer to make the shot, without touching the camera.
- Shoot at base ISO: The low ISO minimizes digital noise and achieves the optimum picture quality. Tripods enable more time to be spent on the base ISO without the fear of camera shakiness.
- Enable mirror lock-up (DSLRs): Vibration can be created by the movement of the mirror in a DSLR. Mirror lock-up only delays the mirror flip until the exposure has begun, providing you with sharper results.
- Protect the setup from wind: Even when you are on the tripod, your camera can be blown over by the wind. Shoot through a windshield, or close to the tripod, or in some sheltered position.
- Hang weight from the tripod hook for stability: A large number of tripods include a hook at the center column. You can hang your backpack or weight to the camera to bring down the center of gravity to enhance stability.
- Avoid slippery or uneven surfaces: Put the tripod on firm, stable ground. The tripod can be tilted by uneven surfaces or slippery floors, resulting in blurred images.
By applying these tips, you can maximize sharpness and ensure your tripod produces professional-quality results every time.
Conclusion:
A tripod is an effective device that can be used to take clear and professional photographs. With proper installation and with your camera fastened in place, and simple tricks such as a remote shutter or a low center column,n you can prevent the blur and the shaking. A tripod is all you need to be able to shoot in low-light scenarios or produce long exposures, landscapes, or use heavy lenses to get stability and control to frame every shot. Therefore, after practice, it will prove to be an indispensable part of your photography gear, and your pictures will be even clearer and more reliable.
FAQs
1. How do you use a basic tripod?
Set it on stable ground, attach your camera securely, and avoid touching the camera while the shutter is open. This ensures sharp, vibration-free shots.
2. Can beginners use a tripod easily?
Yes, tripods are beginner-friendly. They stabilize your camera and greatly improve photo sharpness, even for first-time users.
3. Can you use a tripod with a phone camera?
Yes, use a phone tripod mount or clamp to secure your smartphone safely. Make sure it is tightly held and balanced.
4. How do you use a tripod for a phone?
Attach your phone to a tripod mount, position it on a stable surface, and use a remote shutter or timer to avoid shaking while taking photos or videos.
5. Can you use a tripod as a selfie stick?
Some tripods have extendable legs or detachable mounts that allow them to double as a selfie stick. Ensure your device is securely mounted before extending or holding it.
6. What is the use of a tripod stand in a laboratory?
Tripods in labs support instruments, flasks, or equipment at a stable height for experiments. They prevent tipping and ensure accurate measurements or heating.